Monday, October 12, 2020

HTTP Load Balancing Strategy


This topic describes strategies to consider when configuring HTTP load balancing for your Layer7 API Gateway.

Choosing a strategy often includes several sub-components: balancing, affinity, failure detection. 

Load Balancing Strategy for New Connections

A Load Balancing strategy is also known as the "Balancing Algorithm". These are the most common strategies. 

Round-Robin

This is the simplest strategy, easiest to visualize, easiest to implement. This method rotates incoming requests across the different Gateway nodes, regardless of the load. This strategy is less desirable especially for SSL, as it causes a large increase in the number of SSL negotiations. It also can prevent HTTP 'keepalive' from working, depending on the particular Load Balancer implementation. Lastly, this strategy does not consider the account server load.

Least Connections

This method selects the service with the least number of active connections to ensure that the load of active requests is balanced on the services and nodes. This is a common strategy that is simple to implement and understand, and it works well in most instances. It is a good alternative to round-robin, as the number of connections can be a reasonable proxy for load if the server in question is doing the same function.

Least Load

This method selects the node with the least amount of load. However, it is uncommon for a Load Balancer to do a real system load query using SNMP query or something similar. Reason: Doing so is more resource intensive compared to other passive methods.

Modern Load Balancers use several mechanisms to select the optimal back-end pool member, including:

  1. application response time
  2. pre-configured and dynamic pool member ratios
  3. number of active sessions (which is different from number of connections)
  4. predictive methods that analyze performance over time and anticipate growing pool member load.
Application response times are commonly used, but they have a serious downside. HTTP 500 responses and other errors from broken application servers have typically fast response times AND the errors always close the keep-alive. This means that a server that is down causes a load balancing pool to favor it unnaturally. Reason: Both the connection count is below and the average response time is be short.

Choosing an Affinity Strategy

Affinity is how the Load Balancer chooses a server for a connection from a client that has previously sent a connection. Different affinity strategies can affect performance. 

SSL Session Affinity

SSL Session Affinity is the most flexible affinity strategy and is preferred for SSL sessions. This strategy inspects the section of the SSL initial packet that encodes the SSL session identifier. If jjit is empty, then this represents a net new connection. 
Almost all public and private API traffic is protected by SSL.

Note
(For HA Proxy) http://blog.haproxy.com/2011/07/04/maintain-affinity-based-on-ssl-session-id/
(For F5) https://support.f5.com/csp/knowledge-center/software

IP Affinity

IP Affinity is the default setting in most standard Load Balancer configurations. This setting is sufficient if you have a use case that is strictly Business to Consumer.
This strategy is less effective with smaller counts of client systems. This is because the "averages" do not produce good load balancing if the number of client systems is within an order of magnitude as the number of server systems being balanced.
IP Affinity is also ineffective when proxy servers are used. These proxies effectively consolidate many clients behind a single IP address.

HTTP Session Cookie Affinity

HTTPS sessions are less applicable in the API world, as relatively few modern API implementations use cookie-based sessions. OAuth or JWT credentials are the emerging trends, and they are not session based, but make messages idempotent.
A session cookie must terminate SSL on the Load Balancer (or be non-SSL) to inspect the HTTP headers to look at the session cookies.
Most APIs are SSL protected.

No Affinity

Not using affinity is not recommended for most heavy usage situations. Even for light-usage applications where balancing is not the main focus, affinity helps with High Availability.

Failure Detection

The standard method of detecting failures is to send a request to a service. The Layer7 API Gateway has an HTTP service that is designed specifically to work with Load Balancer active detection modes. This has performance implications and should not be used if the design involves multiple virtual end points (Called VIPs in F5) connecting to the same pool of servers.
For more information, see "Load Balancer Health Check" in Configuring the Load Balancer.

Note :
Some systems use ICMP ping. This does not detect many failure cases and is not recommended.


Real World Guidance

CA Technologies provides the following guidance based on experience with real-world deployments. 

Choose the Affinity and Load Balancing strategy appropriate to the use case

Consider the following issues:

Some Load Balancers allow you to configure the load balancing algorithm and affinity separately. This capability is crucial. Some popular older devices did not, which causes serious issues. For example, Cisco® CSM and CSS are examples of models that do not have separate configuration.

Keep in mind this distinction: 

"Load Balancing Algorithm (Strategy)" is about choosing the back-end server to send a request from a client with which the Load Balancer has never connected before

"Affinity" is where to send a request from a client from which the Load Balancer has already seen traffic.

Affinity makes a significant difference for SSL. The ability to reuse SSL sessions increases performance dramatically. Tests are performed on VMware-based Virtual Appliances show a throughput increase of more than 15x (from 1.7K TPS to 28K TPS ). 

Performance tests differ from production scaling. For instance, customers often want perfect load distribution, but have a limited number of clients. As a result, performance test staff may turn off affinity to achieve better load distribution. The untintended side effect is that this may increase the CPU load on the Gateways due to the overhead of SSL session negotiation.

Set both Load Balancer timeouts and Routing Assertion connection and read timeouts appropriate to system behavior at a business level

The Layer7 API Gateway is factory set with the following defaults:

30 second connection timeout

3 retries

60 second read timeout

This may impact user experience in high-performance environments, as users may resend requests before the 60 seconds timeout, which increases the server load.

You should decide which is preferable at your business: respond quickly with an error to a client API request, or respond more slowly with fewer errors. This may also encourage you to check your entire signal chain for performance.

Many Load Balancers have timeouts for how long a connection is active (meaning how long it waits for the back-end to respond). If that time is shorter than the Gateway read timeout, then you encounter the CLOSE_WAIT issue. To prevent this from happening, configure the Load Balancer to send a TCP RST if the connection closes before the read completes. 

SSL Termination

If you terminate SSL on the Load Balancer, some use cases may not function as expected. Sometimes you can rewrite policy to make this work and sometimes you cannot.

A common specific case: Mutual Auth SSL to mobile devices using the MAG MSSO SDK is more difficult to do with Load Balancer-based SSL termination because of the complicated certificate provisioning. There are some ways around this, but they have large implications in terms of policy authoring support.

Conclusion

CA Technologies recommends using SSL session affinity with an HTTP Load Balancer. It provides the most benefits, with the least number of drawbacks. 


Reference :


Load Balancer


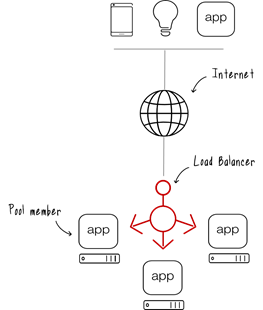
A load balancer is a device that acts as a reverse proxy and distributes network or application traffic across a number of servers. Load balancers are used to increase capacity (concurrent users) and reliability of applications. They improve the overall performance of applications by decreasing the burden on servers associated with managing and maintaining application and network sessions, as well as by performing application-specific tasks.

Load balancers are generally grouped into two categories: Layer 4 and Layer 7. Layer 4 load balancers act upon data found in network and transport layer protocols (IP, TCP, FTP, UDP). Layer 7 load balancers distribute requests based upon data found in application layer protocols such as HTTP.

Requests are received by both types of load balancers and they are distributed to a particular server based on a configured algorithm. Some industry standard algorithms are:

  • Round robin
  • Weighted round robin
  • Least connections
  • Least response time
what is a load balancer

Layer 7 load balancers can further distribute requests based on application specific data such as HTTP headers, cookies, or data within the application message itself, such as the value of a specific parameter.

Load balancers ensure reliability and availability by monitoring the "health" of applications and only sending requests to servers and applications that can respond in a timely manner.


Reference :


Wednesday, April 1, 2020

Spring Cloud Gateway Example


In a previous tutorial we had implemented API Gateway using Netflix Zuul Component. However Zuul is a blocking API. A blocking gateway api makes use of as many threads as the number of incoming requests. So this approach is more resource intensive. If no threads are available to process incoming request then the request has to wait in queue.
In this tutorial we will be implementing API Gateway using Spring Cloud Gateway. Spring Cloud Gateway is a non blocking API. When using non blocking API, a thread is always available to process the incoming request. These request are then processed asynchronously in the background and once completed the response is returned. So no incoming request never gets blocked when using Spring Cloud Gateway.
We will first look at what is API gateway and why are they needed. Then we will be exploring the Spring Cloud Gateway Architecture and implement an API Gateway using it.

Video

This tutorial is explained in the below Youtube Video.


What is an API Gateway? Why do we need it?

An API Gateway acts as a single entry point for a collection of microservices. Any external client cannot access the microservices directly but can access them only through the application gateway
In a real world scenario an external client can be any one of the three-
  • Mobile Application
  • Desktop Application
  • External Services or third party Apps

spring cloud gateway tutorial

The advantages of this approach are as follows-
  • This improves the security of the microservices as we limit the access of external calls to all our services.
  • The cross cutting concerns like authentication, monitoring/metrics, and resiliency will be needed to be implemented only in the API Gateway as all our calls will be routed through it.
  • The client does not know about the internal architecture of our microservices system. Client will not be able to determine the location of the microservice instances.
  • Simplifies client interaction as he will need to access only a single service for all the requirements.

Spring Cloud Gateway Architecture

Spring Cloud Gateway is API Gateway implementation by Spring Cloud team on top of Spring reactive ecosystem. It consists of the following building blocks-
  • Route: Route the basic building block of the gateway. It consists of
    • ID
    • destination URI
    • Collection of predicates and a collection of filters
  • A route is matched if aggregate predicate is true.
  • Predicate: This is similar to Java 8 Function Predicate. Using this functionality we can match HTTP request, such as headers , url, cookies or parameters.
  • Filter: These are instances Spring Framework GatewayFilter. Using this we can modify the request or response as per the requirement. We will be looking at filters in detail in the next tutorial - Spring Cloud Tutorial - Spring Cloud Gateway Filters Example

spring cloud gateway architecture
When the client makes a request to the Spring Cloud Gateway, the Gateway Handler Mapping first checks if the request matches a route. This matching is done using the predicates. If it matches the predicate then the request is sent to the filters.


Implementing Spring Cloud Gateway

Using Spring Cloud Gateway we can create routes in either of the two ways -
  • Use java based configuration to programmatically create routes
  • Use property based configuration(i.e application.properties or application.yml) to create routes.
In this tutorial we will be implementing Spring Cloud Gateway using both configurations.
We will be implementing Spring Cloud Gateway application which routes request to two other microservices depending on the url pattern.
spring cloud gateway

Implement First Microservice

The Maven project will be as follows-
spring cloud first microservice

The pom.xml will be as follows:

<?xml version="1.0" encoding="UTF-8"?>
<project xmlns="http://maven.apache.org/POM/4.0.0" xmlns:xsi="http://www.w3.org/2001/XMLSchema-instance"
 xsi:schemaLocation="http://maven.apache.org/POM/4.0.0 http://maven.apache.org/xsd/maven-4.0.0.xsd">
 <modelVersion>4.0.0</modelVersion>
 <parent>
  <groupId>org.springframework.boot</groupId>
  <artifactId>spring-boot-starter-parent</artifactId>
  <version>2.1.7.RELEASE</version>
  <relativePath /> <!-- lookup parent from repository -->
 </parent>
 <groupId>com.javainuse</groupId>
 <artifactId>first-service</artifactId>
 <version>0.0.1-SNAPSHOT</version>

 <properties>
  <java.version>1.8</java.version>
 </properties>

 <dependencies>
  <dependency>
   <groupId>org.springframework.boot</groupId>
   <artifactId>spring-boot-starter-web</artifactId>
  </dependency>
 </dependencies>

</project>
Define the application.yml as follows-
spring:
  application:
    name: first-service
server:
  port: 8081
Create a Controller class that exposes the GET REST service as follows-
package com.javainuse.controller;

import org.springframework.web.bind.annotation.*;

@RestController
@RequestMapping("/employee")
public class FirstController {

 @GetMapping("/message")
 public String test() {
  return "Hello JavaInUse Called in First Service";
 }
}

Create the bootstrap class with the @SpringBootApplication annotation
package com.javainuse;

import org.springframework.boot.SpringApplication;
import org.springframework.boot.autoconfigure.SpringBootApplication;

@SpringBootApplication
public class FirstApplication {

 public static void main(String[] args) {
  SpringApplication.run(FirstApplication.class, args);
 }

}

Implement Second Microservice

The Maven project will be as follows-
spring cloud second microservice
The pom.xml will be as follows-
<?xml version="1.0" encoding="UTF-8"?>
<project xmlns="http://maven.apache.org/POM/4.0.0" xmlns:xsi="http://www.w3.org/2001/XMLSchema-instance"
 xsi:schemaLocation="http://maven.apache.org/POM/4.0.0 http://maven.apache.org/xsd/maven-4.0.0.xsd">
 <modelVersion>4.0.0</modelVersion>
 <parent>
  <groupId>org.springframework.boot</groupId>
  <artifactId>spring-boot-starter-parent</artifactId>
  <version>2.1.7.RELEASE</version>
  <relativePath /> <!-- lookup parent from repository -->
 </parent>
 <groupId>com.javainuse</groupId>
 <artifactId>second-service</artifactId>
 <version>0.0.1-SNAPSHOT</version>

 <properties>
  <java.version>1.8</java.version>
 </properties>

 <dependencies>
  <dependency>
   <groupId>org.springframework.boot</groupId>
   <artifactId>spring-boot-starter-web</artifactId>
  </dependency>
 </dependencies>

</project>
Define the application.properties as follows-
spring:
  application:
    name: second-service
server:
  port: 8082
Create a Controller class that exposes the GET REST service as follows-
package com.javainuse.controller;

import org.springframework.web.bind.annotation.*;

@RestController
@RequestMapping("/consumer")
public class SecondController {

 @GetMapping("/message")
 public String test() {
  return "Hello JavaInUse Called in Second Service";
 }

}
Create the bootstrap class with the @SpringBootApplication annotation
package com.javainuse;

import org.springframework.boot.SpringApplication;
import org.springframework.boot.autoconfigure.SpringBootApplication;

@SpringBootApplication
public class SecondApplication {

 public static void main(String[] args) {
  SpringApplication.run(SecondApplication.class, args);
 }
}

Implement Spring Cloud Gateway using property based config

The Maven project will be as follows-
spring cloud gateway microservice

The pom.xml will be as follows-
<?xml version="1.0" encoding="UTF-8"?>
<project xmlns="http://maven.apache.org/POM/4.0.0" xmlns:xsi="http://www.w3.org/2001/XMLSchema-instance"
 xsi:schemaLocation="http://maven.apache.org/POM/4.0.0 http://maven.apache.org/xsd/maven-4.0.0.xsd">
 <modelVersion>4.0.0</modelVersion>
 <groupId>com.javainuse</groupId>
 <artifactId>cloud-gateway-service</artifactId>
 <version>0.0.1-SNAPSHOT</version>
 <name>gateway-service</name>

 <properties>
  <java.version>1.8</java.version>
  <spring-cloud.version>Greenwich.SR2</spring-cloud.version>
 </properties>

 <dependencies>
  <dependency>
   <groupId>org.springframework.cloud</groupId>
   <artifactId>spring-cloud-starter-gateway</artifactId>
  </dependency>
 </dependencies>

 <dependencyManagement>
  <dependencies>
   <dependency>
    <groupId>org.springframework.cloud</groupId>
    <artifactId>spring-cloud-dependencies</artifactId>
    <version>${spring-cloud.version}</version>
    <type>pom</type>
    <scope>import</scope>
   </dependency>
  </dependencies>
 </dependencyManagement>
 <repositories>
  <repository>
   <id>spring-milestones</id>
   <name>Spring Milestones</name>
   <url>https://repo.spring.io/milestone</url>
  </repository>
 </repositories>
 <build>
  <plugins>
   <plugin>
    <groupId>org.springframework.boot</groupId>
    <artifactId>spring-boot-maven-plugin</artifactId>
   </plugin>
  </plugins>
 </build>

</project>
Define the application.yml as follows-
server:
  port: 8080

spring:
  cloud:
    gateway:
      routes:
      - id: employeeModule
        uri: http://localhost:8081/
        predicates:
        - Path=/employee/**
      - id: consumerModule
        uri: http://localhost:8082/
        predicates:
        - Path=/consumer/**
Create the bootstrap class with the @SpringBootApplication annotation
package com.javainuse;

import org.springframework.boot.SpringApplication;
import org.springframework.boot.autoconfigure.SpringBootApplication;

@SpringBootApplication
public class APIGatewayApplication {

 public static void main(String[] args) {
  SpringApplication.run(APIGatewayApplication.class, args);
 }

}

Start the three microservices we have developed-
  • Go to url - localhost:8080/employee/message
    spring cloud gateway API tutorial
  • Go to url - localhost:8080/consumer/message
    spring cloud gateway example

Implement Spring Cloud Gateway using Java based config

The Maven project will be as follows-
spring cloud gateway config microservice

The pom.xml will be as follows-
<?xml version="1.0" encoding="UTF-8"?>
<project xmlns="http://maven.apache.org/POM/4.0.0" xmlns:xsi="http://www.w3.org/2001/XMLSchema-instance"
 xsi:schemaLocation="http://maven.apache.org/POM/4.0.0 http://maven.apache.org/xsd/maven-4.0.0.xsd">
 <modelVersion>4.0.0</modelVersion>
 <groupId>com.javainuse</groupId>
 <artifactId>cloud-gateway-service</artifactId>
 <version>0.0.1-SNAPSHOT</version>
 <name>gateway-service</name>

 <properties>
  <java.version>1.8</java.version>
  <spring-cloud.version>Greenwich.SR2</spring-cloud.version>
 </properties>

 <dependencies>
  <dependency>
   <groupId>org.springframework.cloud</groupId>
   <artifactId>spring-cloud-starter-gateway</artifactId>
  </dependency>
 </dependencies>

 <dependencyManagement>
  <dependencies>
   <dependency>
    <groupId>org.springframework.cloud</groupId>
    <artifactId>spring-cloud-dependencies</artifactId>
    <version>${spring-cloud.version}</version>
    <type>pom</type>
    <scope>import</scope>
   </dependency>
  </dependencies>
 </dependencyManagement>
 <repositories>
  <repository>
   <id>spring-milestones</id>
   <name>Spring Milestones</name>
   <url>https://repo.spring.io/milestone</url>
  </repository>
 </repositories>
 <build>
  <plugins>
   <plugin>
    <groupId>org.springframework.boot</groupId>
    <artifactId>spring-boot-maven-plugin</artifactId>
   </plugin>
  </plugins>
 </build>

</project>
Define the application.yml as follows-
server:
  port: 8080
Create the configuration class where we define the route configurations. Gateway Handler resolves route configurations by using RouteLocator Bean.
package com.javainuse.config;

import org.springframework.cloud.gateway.route.RouteLocator;
import org.springframework.cloud.gateway.route.builder.RouteLocatorBuilder;
import org.springframework.context.annotation.Bean;
import org.springframework.context.annotation.Configuration;

@Configuration
public class SpringCloudConfig {

    @Bean
    public RouteLocator gatewayRoutes(RouteLocatorBuilder builder) {
        return builder.routes()
                .route(r -> r.path("/employee/**")
                        .uri("http://localhost:8081/")
                        .id("employeeModule"))

                .route(r -> r.path("/consumer/**")
                        .uri("http://localhost:8082/")
                        .id("consumerModule"))
                .build();
    }

}
Create the bootstrap class with the @SpringBootApplication annotation
package com.javainuse;

import org.springframework.boot.SpringApplication;
import org.springframework.boot.autoconfigure.SpringBootApplication;

@SpringBootApplication
public class APIGatewayApplication {

 public static void main(String[] args) {
  SpringApplication.run(APIGatewayApplication.class, args);
 }

}

Start the three microservices we have developed-
  • Go to url - localhost:8080/employee/message
    spring cloud gateway API tutorial
  • Go to url - localhost:8080/consumer/message
    spring cloud gateway example


Friday, January 10, 2020

Load Balancing Techniques and Optimizations

The hosting world’s bread & butter solution for providing high availability and redundancy is load balancing. There are many different use cases for a Load Balancer (LB). It is important to know how to effectively manage your LB configuration so that it performs optimally in your environment.  The proceeding article will review some of the common practices that, when adhered to, provide a smooth and seamless high availability website/application through the use of load balancing.
Prerequisites
This article will focus on load balancing concepts and uses typical web services (HTTP, HTTPS). These services are independent of the LB device itself so they can run on any combination of operating system and server software, e.g.,  Linux, Windows, Apache, Nginx, IIS, etc. Load balancing is not limited to just web services. Any type of traffic with a client/server relationship can take advantage of load balancing.

What is Load Balancing?

Load balancing is the practice of using a network device, called a Load Balancer (LB), to distribute traffic between a back-end cluster of servers, called nodes. These nodes are virtually identical, each running the same software, services, and configurations. Broken nodes can be easily replaced by additional nodes which are also added to handle traffic growth over time. This prevents a single node from becoming overwhelmed as the LB uses specific load balancing algorithmic methods to determine which node handles subsequent requests. Load balancing is virtually invisible to the end-user, operating behind the scenes allowing a farm of servers to function as a single service or application. Load balancing comprises the backbone of most high availability solutions due to its flexibility, redundancy, and extendability.

OSI Layer Optimization

All load balancing occurs on one of two layers of The OSI Model. These layers allow for traffic balancing configurations based on different information that is contained in the network packet for that specific layer. The two layers involved in this process are the L4 Transport and L7 Application layer.
  • L4 – Transport Layer: The fourth layer allows balancing rules based on transport protocols. Balancing traffic based on details like IP Address or TCP Port are provided within the L4 layer.
  • L7 – Application Layer: The Application Layer provides many additional details that can be inspected from the packet for balancing rules. The L7 layer is where rules can be constructed based on information from HTTP Headers, SSL Session ID, HTML Form Data, Cookies, etc.
Rule of Thumb:
For efficiency use the L4 layer. L4 load balancing happens earlier in the transaction, so that traffic can be routed more quickly than L7. L7 load balancing has to inspect data from the application layer. But, it is not always possible to rely on the L4 layer, and it will depend heavily on the services and back-end node configuration.

Load Balancing Algorithmic Methods

There are several common balancing algorithmic methods which can be used in a load-balanced configuration. Selecting the right algorithm for your infrastructure is critical to load balancing optimization. There is no general, one-size-fits-all,  method for every situation. Choosing the correct approach will depend heavily upon the services, traffic, and software used in the load-balanced cluster. Below are some of the common methods used and their strengths/weaknesses from an optimization perspective.

 Round-Robin-  A simplistic load balancing approach. Traffic is sent to each node in series, one after the other, jumping back to the beginning of the list once the end is reached. (e.g., Node 1 → Node 2 → Node 3 → Repeat)
Round-Robin Pros & Cons:
+ Pros: Lower memory and CPU footprint from the Load Balancer.
– Cons: Not adaptive, sends traffic to nodes without regard for distribution.

 Least Connections   A smart balancing method which uses connection tracking to determine which of the nodes has the least number of active network connections. This tracking is managed by the load balancer device itself distributing every new connection to the back-end node with the least amount of active connections.
Least Connections Pros & Cons:
+ Pros: Adaptive, provided even distribution of workload among nodes.
– Cons: Requires larger memory and CPU footprint for connection tracking.

 Fastest Response Time   A smart balancing method which tracks each nodes network response time from health checks and routes new connections to the server with the quickest response time, regardless of any other factors.
Fastest Response Time Pros & Cons:
+ Pros: Adaptive, low memory, and CPU requirement.
– Cons: Limited workload distribution, connections and workload often fills up one node at a time.

 Random Node   A niche method which is only used in very specific scenarios and is almost never appropriate from an optimization standpoint.
Random Node Pros & Cons:
+ Pros: Requires a low memory and CPU footprint from load balancer device.
– Cons: Niche, only useful in specific scenarios. Unreliable distribution of workload.

Weighted Load Balancing
Another useful load balancing feature to consider is weighted nodes along with the balancing method. Weighted load balancing assigns additional connections to specific nodes over others dependent on each nodes weight value in the configuration. This feature is generally used when back-end nodes are not identical hardware or certain nodes receive special traffic beyond regular load-balanced traffic. Assigning a lower weight value in the form of a ratio to the weaker nodes allows them to participate in the workload at their individual capacity limits without getting overwhelmed. For example, a weight ratio of 2:2:1, would assign two connections to node 1 & node 2 for every 1 connection assigned to Node 3.
Choosing an Optimal Balancing Algorithm
When considering load balancing optimization, stick with the smarter balancing methods like Least Connections or in some cases Fastest Response TimeLeast Connections, in particular, is good at distributing workload between all available hardware without focusing too much on a single node. However, this balancing method will require a beefier load balancing device as the amount of nodes and traffic ramp up. Fastest Response Time can be a great alternative when the hardware available for the load balancer is more limited. Each has its pros and cons as listed above, but both work well as optimized balancing methods for busy server farms.
Traffic Pinning & Session Persistence
Some configurations take advantage of pinning certain traffic to specific back-end nodes depending on the traffic. Session Persistence is a widely used form of Traffic Pinning as it results in routing requests to specific servers outside of the load balancing method used. Another common practice is assigning administration or upload traffic to a specific node that propagates the changes to the rest of the server farm. It is important to consider these connection types when designing or optimizing your server cluster.
Pro Tip:
Least Connections works well with configurations that rely on Traffic Pinning and/or Session Persistence. Since these features group connections to specific nodes independent of the load balancing algorithms. These connects are included in the connection tracking of the Least Connections balancing method which allows the load balancer to proportionately assign traffic to the least busy nodes while accounting for the existing pinned traffic.

Server Farm/Cluster Scope

Some important considerations should be accounted for when designing or upgrading your server cluster. A common mistake that gets overlooked is the size of the cluster. The amount of nodes available in the cluster should not only be enough to handle regular workloads. It’s also necessary to account for both surges in workload as well as failures in the cluster. Ideally, a cluster should be large enough to remain fully operational, even when a surge in workload occurs and a critical event throws a node offline.
Rule of Thumb:
The cluster should be large enough to handle traffic surges plus at-least one extra node for redundancy.

Redundancy: Spare vs. Fail-over Node

Quite simply, redundancy is not effective without an extra node to handle the workload in the event that a critical issue occurs with another node. There are essentially two methods of handling redundancy in a load-balanced cluster.
 Spare Node   An extra node in the cluster that is not needed for the cluster to function. It resided active in the cluster, handling workload just like any other node. However, it’s there in case another node falls. The cluster can carry on without interruption, while the broken node is addressed as needed.
Spare Node Pros & Cons:
+ Pros: Seamless redundancy, there is no downtime between a critical event and the promotion of the spare.
– Cons:  Continuous use of the spare can lead to it failing along with another node when it is needed most.
 Failover Node    An extra node, that has been configured and tested to work normally within the cluster. Once tested, the extra node is assigned as a fail-over node and taken out of the active configuration. The fail-over node, then sits on standby, waiting for a critical event to occur within the cluster. The fail-over node is then automatically activated in the cluster and start handling traffic.
Spare Node Pros & Cons:
+ Pros: Almost no risk of the fail-over node having hardware problems when it is needed.
– Cons: Delay between node failure and activation of the fail-over node.
Either method provides redundancy and keeps the application/site alive during critical times. A combination of both methods can be used as well to have the benefit of both options. It boils down to preference and cost. However, adhering to at least one of these methods should keep you running at an optimal state even during hard times.

Front-loaded Permanent Redirects

One way to improve response times of a load-balanced setup is to mitigate permanent redirects. This is done by moving them onto the load balancer device directly, instead of relying on the back-end nodes to issue a redirect to the client. This can reduce connection counts on both the load balancer and the back-end nodes themselves by eliminating one segment of the redirect process. The following illustrates this further when using a common practice of forcing HTTPS via redirects.
When a back-end node is configured to force HTTPS connections, the HTTP request comes into the load balancer, then is processed by the balancing algorithm and finally sent onto the necessary back-end node as normal. The back-end node then issues the redirect, which instructs the client to reconnect over the HTTPS protocol. The new HTTPS request is also balanced by the algorithm as needed and sent to a back-end node. The net processing result of this type of redirect is:
  • x2 front-end requests (HTTP & HTTPS)
  • x2 back-end requests
  • x2 load balancing algorithmic checks
Now compare this to a front-loaded HTTPS redirect.
In the front-load configuration, the HTTP request hits the load balancer but is not processed by the balancing algorithm. Instead, it immediately issues the redirect back to the client. Then the client reconnects over HTTPS protocol, which then invokes the algorithm as needed and is sent onto the back-end node as required. The net processing result of this configuration is:
  • x2 front-end requests (HTTP & HTTPS)
  • x1 back-end request (HTTPS only)
  • x1 load balancing algorithmic checks
This example only illustrates a single request. However, load balancers typically handle hundreds or even thousands of requests concurrently. It is easier to see the overall benefit of a change like this when scaling up the example:

SSL Decryption

There are a handful of ways that load balancers are configured to handle SSL encrypted connections like HTTPS. Encrypted connections are more cumbersome on the load balancer device than non-encrypted connects. The process of validating the certificate chain and then decryption the content adds additional workload to every request handled by the load balancer. This can be mitigated depending on the configuration of the back-end cluster servers and the applications/website’s encryption requirements. The following are the common configuration scenarios and their pros/cons.
 SSL Passthrough –   The LB is configured to pass any encrypted connections through to the necessary back-end nodes. Decryption is handled by the back-end nodes only and not the LB device.
SSL Passthrough Pros & Cons:
+ Pros: Simple configuration, high security, low CPU/memory footprint. Offers end-end-encryption.
– Cons: Limited to L4 Layer load balancing. Cannot perform packet inspection.
 Decryption Only –  The LB device itself will perform the necessary decryption. Traffic is then balanced to the back-end nodes after decryption. Due to security concerns, this configuration is only recommended when the back-end nodes and load balancer device have an isolated LAN to communicate through.
Decryption Only Pros & Cons
+Pros: Allows packet inspection for L7 Layer load balancing rules. Back-end nodes do not handle decryption.
– Cons: Any machines on the network can read decrypted back-end traffic.
 Decryption + Re-encryption–  Decryption is handled by both the LB device and then re-encrypted and sent to the back-end node as needed. The back-end node also performs decryption providing full end-to-end encryption. This method is for high-security setups that also require L7 load balancing rules.
Decryption + Re-encryption Pros & Cons:
+ Pros: Maximum security with end-to-end encryption. L7 load balancing rules & full packet inspection.
– Cons: Higher workload demand on the LB device. Encryption must be set up on both the front and back-end.
The load balancing optimization stance is the less workload the LB performs, the faster it responds to requests. This makes SSL Passthrough the ideal choice as it requires the least amount of work from the LB device. However, this is not always the practical solution for some applications/sites, particularly those that require L7 layer load balancing or other packet inspection needs. Decryption Only requires less workload when compared to Decryption + Re-encryption, but should only be leveraged when running a dedicated LB on a private LAN with the back-end nodes preventing outside entities from abusing the non-encrypted back-end traffic.

Reference: