Tuesday, March 31, 2020

Docker Compose + Python + Flask Example


On this page you build a simple Python web application running on Docker Compose. The application uses the Flask framework and maintains a hit counter in Redis. While the sample uses Python, the concepts demonstrated here should be understandable even if you’re not familiar with it.

Prerequisites

Make sure you have already installed both Docker Engine and Docker Compose. You don’t need to install Python or Redis, as both are provided by Docker images.

Step 1: Setup

Define the application dependencies.
  1. Create a directory for the project:
    $ mkdir composetest
    $ cd composetest
    
  2. Create a file called app.py in your project directory and paste this in:
    import time
    
    import redis
    from flask import Flask
    
    app = Flask(__name__)
    cache = redis.Redis(host='redis', port=6379)
    
    
    def get_hit_count():
        retries = 5
        while True:
            try:
                return cache.incr('hits')
            except redis.exceptions.ConnectionError as exc:
                if retries == 0:
                    raise exc
                retries -= 1
                time.sleep(0.5)
    
    
    @app.route('/')
    def hello():
        count = get_hit_count()
        return 'Hello World! I have been seen {} times.\n'.format(count)
    
    In this example, redis is the hostname of the redis container on the application’s network. We use the default port for Redis, 6379.
    Handling transient errors
    Note the way the get_hit_count function is written. This basic retry loop lets us attempt our request multiple times if the redis service is not available. This is useful at startup while the application comes online, but also makes our application more resilient if the Redis service needs to be restarted anytime during the app’s lifetime. In a cluster, this also helps handling momentary connection drops between nodes.
  3. Create another file called requirements.txt in your project directory and paste this in:
    flask
    redis
    

Step 2: Create a Dockerfile

In this step, you write a Dockerfile that builds a Docker image. The image contains all the dependencies the Python application requires, including Python itself.
In your project directory, create a file named Dockerfile and paste the following:
FROM python:3.7-alpine
WORKDIR /code
ENV FLASK_APP app.py
ENV FLASK_RUN_HOST 0.0.0.0
RUN apk add --no-cache gcc musl-dev linux-headers
COPY requirements.txt requirements.txt
RUN pip install -r requirements.txt
COPY . .
CMD ["flask", "run"]
This tells Docker to:
  • Build an image starting with the Python 3.7 image.
  • Set the working directory to /code.
  • Set environment variables used by the flask command.
  • Install gcc so Python packages such as MarkupSafe and SQLAlchemy can compile speedups.
  • Copy requirements.txt and install the Python dependencies.
  • Copy the current directory . in the project to the workdir . in the image.
  • Set the default command for the container to flask run.
For more information on how to write Dockerfiles, see the Docker user guide and the Dockerfile reference.

Step 3: Define services in a Compose file

Create a file called docker-compose.yml in your project directory and paste the following:
version: '3'
services:
  web:
    build: .
    ports:
      - "5000:5000"
  redis:
    image: "redis:alpine"
This Compose file defines two services: web and redis.

Web service

The web service uses an image that’s built from the Dockerfile in the current directory. It then binds the container and the host machine to the exposed port, 5000. This example service uses the default port for the Flask web server, 5000.

Redis service

The redis service uses a public Redis image pulled from the Docker Hub registry.

Step 4: Build and run your app with Compose

  1. From your project directory, start up your application by running docker-compose up.
    $ docker-compose up
    Creating network "composetest_default" with the default driver
    Creating composetest_web_1 ...
    Creating composetest_redis_1 ...
    Creating composetest_web_1
    Creating composetest_redis_1 ... done
    Attaching to composetest_web_1, composetest_redis_1
    web_1    |  * Running on http://0.0.0.0:5000/ (Press CTRL+C to quit)
    redis_1  | 1:C 17 Aug 22:11:10.480 # oO0OoO0OoO0Oo Redis is starting oO0OoO0OoO0Oo
    redis_1  | 1:C 17 Aug 22:11:10.480 # Redis version=4.0.1, bits=64, commit=00000000, modified=0, pid=1, just started
    redis_1  | 1:C 17 Aug 22:11:10.480 # Warning: no config file specified, using the default config. In order to specify a config file use redis-server /path/to/redis.conf
    web_1    |  * Restarting with stat
    redis_1  | 1:M 17 Aug 22:11:10.483 * Running mode=standalone, port=6379.
    redis_1  | 1:M 17 Aug 22:11:10.483 # WARNING: The TCP backlog setting of 511 cannot be enforced because /proc/sys/net/core/somaxconn is set to the lower value of 128.
    web_1    |  * Debugger is active!
    redis_1  | 1:M 17 Aug 22:11:10.483 # Server initialized
    redis_1  | 1:M 17 Aug 22:11:10.483 # WARNING you have Transparent Huge Pages (THP) support enabled in your kernel. This will create latency and memory usage issues with Redis. To fix this issue run the command 'echo never > /sys/kernel/mm/transparent_hugepage/enabled' as root, and add it to your /etc/rc.local in order to retain the setting after a reboot. Redis must be restarted after THP is disabled.
    web_1    |  * Debugger PIN: 330-787-903
    redis_1  | 1:M 17 Aug 22:11:10.483 * Ready to accept connections
    
    Compose pulls a Redis image, builds an image for your code, and starts the services you defined. In this case, the code is statically copied into the image at build time.
  2. Enter http://localhost:5000/ in a browser to see the application running.
    If you’re using Docker natively on Linux, Docker Desktop for Mac, or Docker Desktop for Windows, then the web app should now be listening on port 5000 on your Docker daemon host. Point your web browser to http://localhost:5000 to find the Hello World message. If this doesn’t resolve, you can also try http://127.0.0.1:5000.
    If you’re using Docker Machine on a Mac or Windows, use docker-machine ip MACHINE_VM to get the IP address of your Docker host. Then, open http://MACHINE_VM_IP:5000 in a browser.
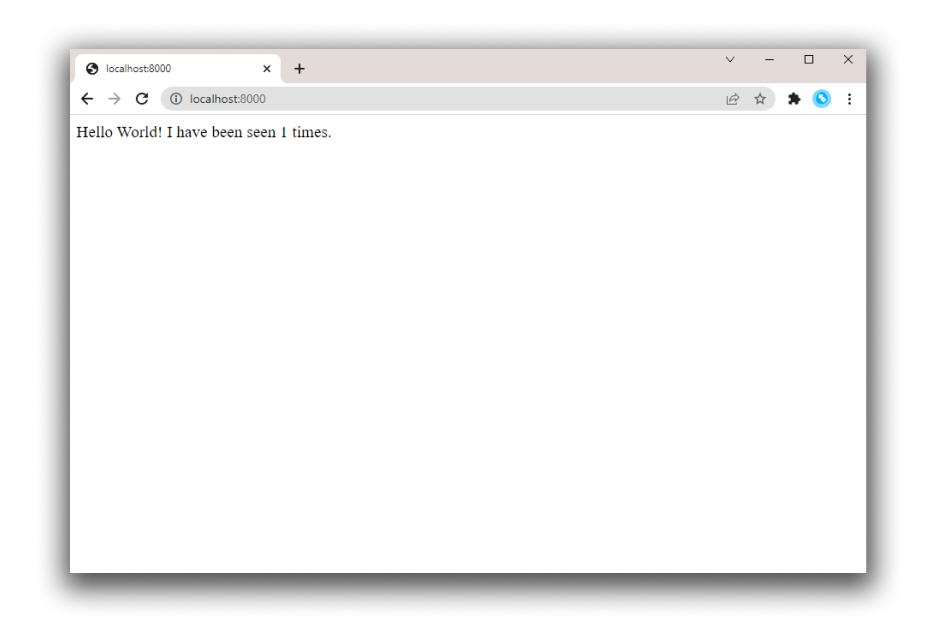
    You should see a message in your browser saying:
    Hello World! I have been seen 1 times.
    
    hello world in browser
  3. Refresh the page.
    The number should increment.
    Hello World! I have been seen 2 times.
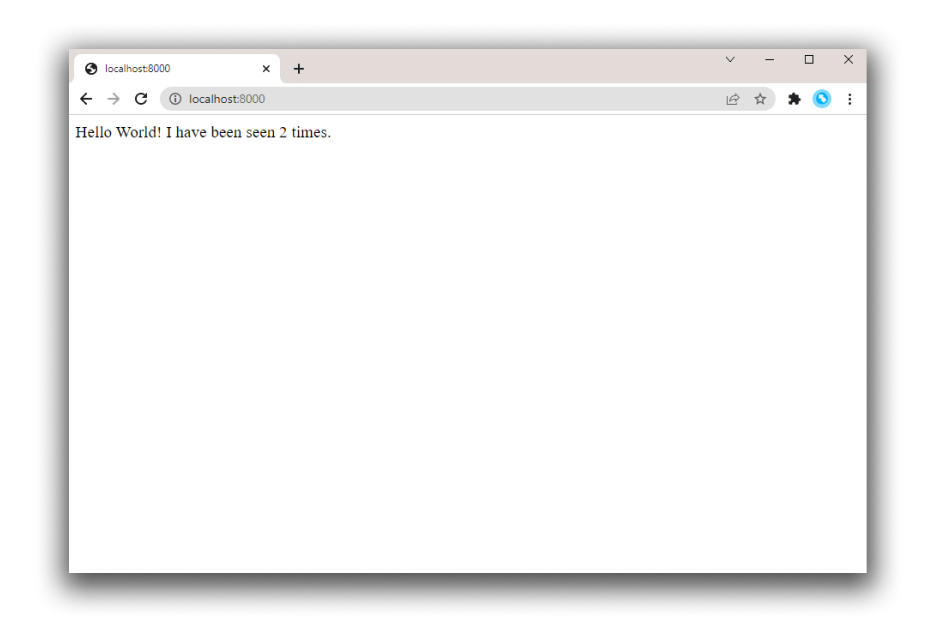
    
    hello world in browser
  4. Switch to another terminal window, and type docker image ls to list local images.
    Listing images at this point should return redis and web.
    $ docker image ls
    REPOSITORY              TAG                 IMAGE ID            CREATED             SIZE
    composetest_web         latest              e2c21aa48cc1        4 minutes ago       93.8MB
    python                  3.4-alpine          84e6077c7ab6        7 days ago          82.5MB
    redis                   alpine              9d8fa9aa0e5b        3 weeks ago         27.5MB
    
    You can inspect images with docker inspect <tag or id>.
  5. Stop the application, either by running docker-compose down from within your project directory in the second terminal, or by hitting CTRL+C in the original terminal where you started the app.

Step 5: Edit the Compose file to add a bind mount

Edit docker-compose.yml in your project directory to add a bind mount for the web service:
version: '3'
services:
  web:
    build: .
    ports:
      - "5000:5000"
    volumes:
      - .:/code
    environment:
      FLASK_ENV: development
  redis:
    image: "redis:alpine"
The new volumes key mounts the project directory (current directory) on the host to /code inside the container, allowing you to modify the code on the fly, without having to rebuild the image. The environment key sets the FLASK_ENV environment variable, which tells flask run to run in development mode and reload the code on change. This mode should only be used in development.

Step 6: Re-build and run the app with Compose

From your project directory, type docker-compose up to build the app with the updated Compose file, and run it.
$ docker-compose up
Creating network "composetest_default" with the default driver
Creating composetest_web_1 ...
Creating composetest_redis_1 ...
Creating composetest_web_1
Creating composetest_redis_1 ... done
Attaching to composetest_web_1, composetest_redis_1
web_1    |  * Running on http://0.0.0.0:5000/ (Press CTRL+C to quit)
...
Check the Hello World message in a web browser again, and refresh to see the count increment.
Shared folders, volumes, and bind mounts
  • If your project is outside of the Users directory (cd ~), then you need to share the drive or location of the Dockerfile and volume you are using. If you get runtime errors indicating an application file is not found, a volume mount is denied, or a service cannot start, try enabling file or drive sharing. Volume mounting requires shared drives for projects that live outside of C:\Users (Windows) or /Users (Mac), and is required for any project on Docker Desktop for Windows that uses Linux containers. For more information, see Shared Drives on Docker Desktop for Windows, File sharing on Docker for Mac, and the general examples on how to Manage data in containers.
  • If you are using Oracle VirtualBox on an older Windows OS, you might encounter an issue with shared folders as described in this VB trouble ticket. Newer Windows systems meet the requirements for Docker Desktop for Windows and do not need VirtualBox.

Step 7: Update the application

Because the application code is now mounted into the container using a volume, you can make changes to its code and see the changes instantly, without having to rebuild the image.
  1. Change the greeting in app.py and save it. For example, change the Hello World! message to Hello from Docker!:
    return 'Hello from Docker! I have been seen {} times.\n'.format(count)
    
  2. Refresh the app in your browser. The greeting should be updated, and the counter should still be incrementing.
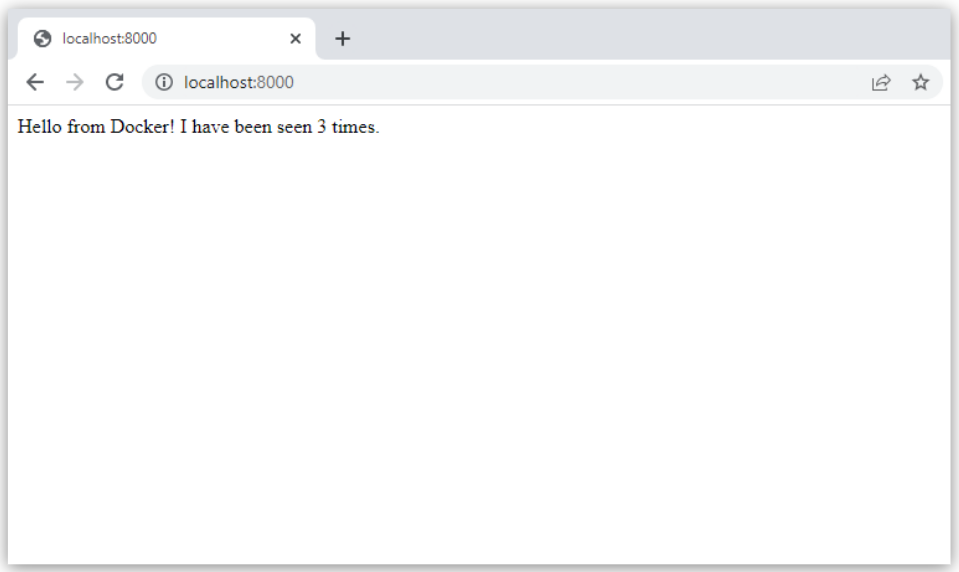
    hello world in browser

Step 8: Experiment with some other commands

If you want to run your services in the background, you can pass the -d flag (for “detached” mode) to docker-compose up and use docker-compose ps to see what is currently running:
$ docker-compose up -d
Starting composetest_redis_1...
Starting composetest_web_1...

$ docker-compose ps
Name                 Command            State       Ports
-------------------------------------------------------------------
composetest_redis_1   /usr/local/bin/run         Up
composetest_web_1     /bin/sh -c python app.py   Up      5000->5000/tcp
The docker-compose run command allows you to run one-off commands for your services. For example, to see what environment variables are available to the web service:
$ docker-compose run web env
See docker-compose --help to see other available commands. You can also install command completion for the bash and zsh shell, which also shows you available commands.
If you started Compose with docker-compose up -d, stop your services once you’ve finished with them:
$ docker-compose stop
You can bring everything down, removing the containers entirely, with the down command. Pass --volumes to also remove the data volume used by the Redis container:
$ docker-compose down --volumes
At this point, you have seen the basics of how Compose works.

Where to go next

documentationdocsdockercomposeorchestrationcontainers

Reference:


Docker + PHP Application Example


We can run php application using docker. In the following steps, we are creating and running php application.
  1. Create a directory
  2. Create a directory to organize files by using following command.
    1. mkdir php-docker-app  
    See, screen shot of the above command.
    Docker Php application 1

  3. Create a Php File
  4. index.php
    1. <?php  
    2.     echo ?Hello, Php?;  
    3. ?>  

  5. Create a DockerFile
  6. Dockefile
    1. FROM php:7.0-apache  
    2. COPY . /var/www/php  
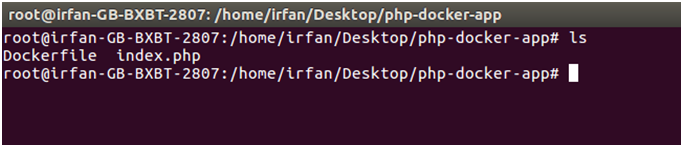
    After that our project has two files like the below screen-shot.
    Docker Php application 2

  7. Create Docker Image
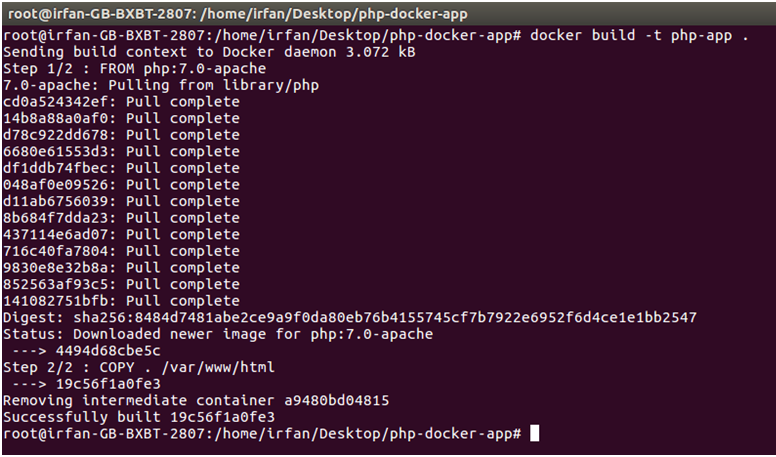
    1. $ docker build -t php-app .  
    In the below screen-shot, we are creating docker image.
    Docker Php application 3Now look for the available images in the docker container.

    Docker Php application 4The above screen-shot shows that the created image php-app is available.
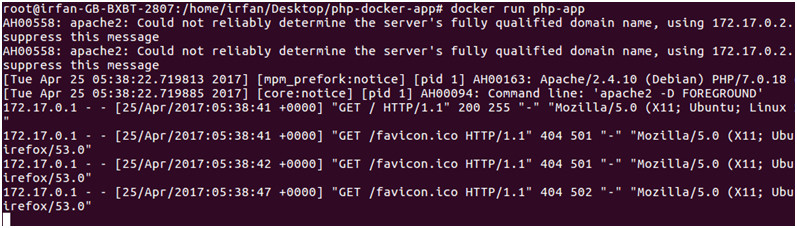
  8. Run the Docker image
  9. Now run the docker image. The following command is used to run docker images.
    1. $ docker run php-app  
    Docker Php application 5We can see that our docker image is running and output is shown to the browser. This image is running on the 172.17.0.2 ip.
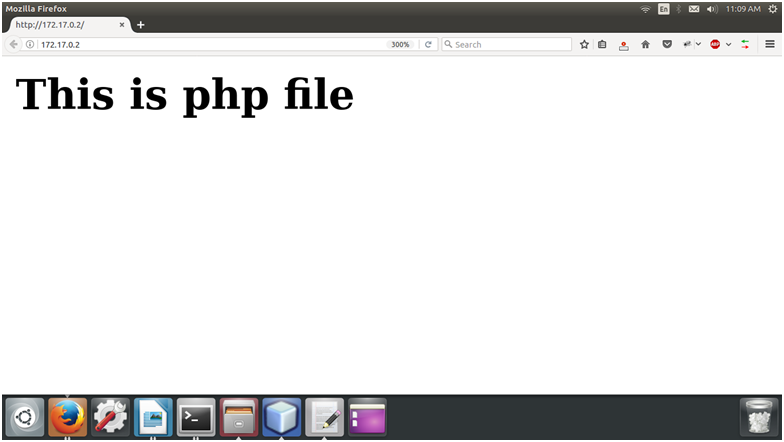
    Output:
    Docker Php application 6


Reference:


Docker + Java Application Example


As, we have mentioned earlier that docker can execute any application.
Here, we are creating a Java application and running by using the docker. This example includes the following steps.
  1. Create a directory
  2. Directory is required to organize files. Create a director by using the following command.
    1. $ mkdir  java-docker-app  
     See, screen shot for the above command.
    Docker Java application 1

  3. Create a Java File
  4. Now create a Java file. Save this file as Hello.java file.
    Hello.java
    1. class Hello{  
    2. public static void main(String[] args){  
    3. System.out.println("This is java app \n by using Docker");  
    4. }  
    5. }  
    Save it inside the directory java-docker-app as Hello.java.

  5. Create a Dockerfile
  6. After creating a Java file, we need to create a Dockerfile which contains instructions for the Docker. Dockerfile does not contain any file extension. So, save it simple with Dockerfile name.
    Dockerfile
    1. FROM java:8  
    2. COPY . /var/www/java  
    3. WORKDIR /var/www/java  
    4. RUN javac Hello.java  
    5. CMD ["java""Hello"]  
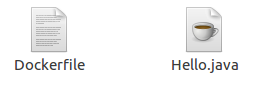
    Write all instructions in uppercase because it is convention. Put this file inside java-docker-app directory. Now we have Dockerfile parallel to Hello.java inside the java-docker-app directory.
    See, your folder inside must look like the below.

    Docker Java application 2

  7. Build Docker Image
  8. After creating Dockerfile, we are changing working directory.
    1. $ cd   java-docker-app  
    See, the screen shot.
    Docker Java application 3
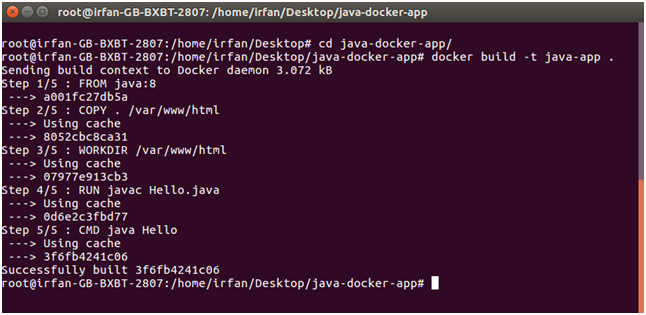
    Now, create an image by following the below command. we must login as root in order to create an image. In this example, we have switched to as a root user. In the following command, java-app is name of the image. We can have any name for our docker image.
    1. $ docker build -t java-app .      
     See, the screen shot of the above command.
    Docker Java application 4
    After successfully building the image. Now, we can run our docker image.

  9. Run Docker Image
  10. After creating image successfully. Now we can run docker by using run command. The following command is used to run java-app.
    1. $ docker run java-app  
     See, the screen shot of the above command.
    Docker Java application 5
    Here, we can see that after running the java-app it produced an output.
    Now, we have run docker image successfully on your system. Apart from all these you can also use other commands as well.

Reference:


Kubernetes + Python (Flask) Example


So, you know you want to run your application in Kubernetes but don’t know where to start. Or maybe you’re getting started but still don’t know what you don’t know. In this blog you’ll walk through how to containerize an application and get it running in Kubernetes.
This walk-through assumes you are a developer or at least comfortable with the command line (preferably bash shell).

What we’ll do

  1. Get the code and run the application locally
  2. Create an image and run the application in Docker
  3. Create a deployment and run the application in Kubernetes

Prerequisites

Containerizing an application

In this section you’ll take some source code, verify it runs locally, and then create a Docker image of the application. The sample application used is a very simple Flask web application; if you want to test it locally, you’ll need Python installed. Otherwise, you can skip to the “Create a Dockerfile” section.

Get the application code

Use git to clone the repository to your local machine:
git clone https://github.com/JasonHaley/hello-python.git
Change to the app directory:
cd hello-python/app
There are only two files in this directory. If you look at the main.py file, you’ll see the application prints out a hello message. You can learn more about Flask on the Flask website.
from flask import Flask
app = Flask(__name__)

@app.route("/")
def hello():
    return "Hello from Python!"

if __name__ == "__main__":
    app.run(host='0.0.0.0')
The requirements.txt file contains the list of packages needed by the main.py and will be used by pip to install the Flask library.
Note: When you start writing more advanced Python, you’ll find it’s not always recommended to use pip install and may want to use virtualenv (or pyenv) to install your dependencies in a virtual environment.

Run locally

Manually run the installer and application using the following commands:
pip install -r requirements.txt
python main.py
This will start a development web server hosting your application, which you will be able to see by navigating to http://localhost:5000. Because port 5000 is the default port for the development server, we didn’t need to specify it.

Create a Dockerfile

Now that you have verified the source code works, the first step in containerizing the application is to create a Dockerfile.
In the hello-python/app directory, create a file named Dockerfile with the following contents and save it:
FROM python:3.7

RUN mkdir /app
WORKDIR /app
ADD . /app/
RUN pip install -r requirements.txt

EXPOSE 5000
CMD ["python", "/app/main.py"]
This file is a set of instructions Docker will use to build the image. For this simple application, Docker is going to:
  1. Get the official Python Base Image for version 3.7 from Docker Hub.
  2. In the image, create a directory named app.
  3. Set the working directory to that new app directory.
  4. Copy the local directory’s contents to that new folder into the image.
  5. Run the pip installer (just like we did earlier) to pull the requirements into the image.
  6. Inform Docker the container listens on port 5000.
  7. Configure the starting command to use when the container starts.

Create an image

At your command line or shell, in the hello-python/app directory, build the image with the following command:
docker build -f Dockerfile -t hello-python:latest .
Note: I’m using the :latest tag in this example, if you are not familiar with what it is you may want to read Docker: The latest Confusion.
This will perform those seven steps listed above and create the image. To verify the image was created, run the following command:
docker image ls
Docker image listing
The application is now containerized, which means it can now run in Docker and Kubernetes!

Running in Docker

Before jumping into Kubernetes, let’s verify it works in Docker. Run the following command to have Docker run the application in a container and map it to port 5001:
docker run -p 5001:5000 hello-python
Now navigate to http://localhost:5001, and you should see the “Hello form Python!” message.

More info

Running in Kubernetes

You are finally ready to get the application running in Kubernetes. Because you have a web application, you will create a service and a deployment.
First verify your kubectl is configured. At the command line, type the following:
kubectl version
If you don’t see a reply with a Client and Server version, you’ll need to install and configure it.
If you are running on Windows or Mac, make sure it is using the Docker for Desktop context by running the following:
kubectl config use-context docker-for-desktop
Now you are working with Kubernetes! You can see the node by typing:
kubectl get nodes
Now let’s have it run the application. Create a file named deployment.yaml and add the following contents to it and then save it:
apiVersion: v1
kind: Service
metadata:
  name: hello-python-service
spec:
  selector:
    app: hello-python
  ports:
  - protocol: "TCP"
    port: 6000
    targetPort: 5000
  type: LoadBalancer

---
apiVersion: apps/v1
kind: Deployment
metadata:
  name: hello-python
spec:
  selector:
    matchLabels:
      app: hello-python
  replicas: 4
  template:
    metadata:
      labels:
        app: hello-python
    spec:
      containers:
      - name: hello-python
        image: hello-python:latest
        imagePullPolicy: Never
        ports:
        - containerPort: 5000
This YAML file is the instructions to Kubernetes for what you want running. It is telling Kubernetes the following: * You want a load-balanced service exposing port 6000 * You want four instances of the hello-python container running
Use kubectl to send the YAML file to Kubernetes by running the following command:
kubectl apply -f deployment.yaml
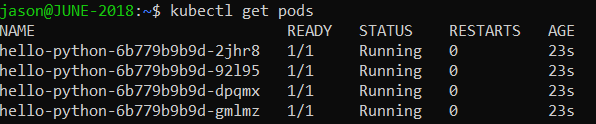
You can see the pods are running if you execute the following command:
kubectl get pods
Pod listing
Now navigate to http://localhost:6000, and you should see the “Hello form Python!” message.
That’s it! The application is now running in Kubernetes!

More Info

Summary

In this walk-through, we containerized an application, and got it running in Docker and in Kubernetes. This simple application only scratches the surface of what’s possible (and what you’ll need to learn).

Next steps

If you are just getting started and this walk-through was useful to you, then the following resources should be good next steps for you to further expand your Kubernetes knowledge:

How to enable Kubernetes in Docker Desktop

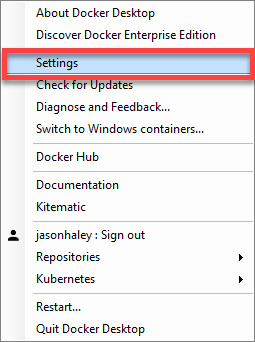
Once you have Docker Desktop installed, open the Settings:
Docker settings menu
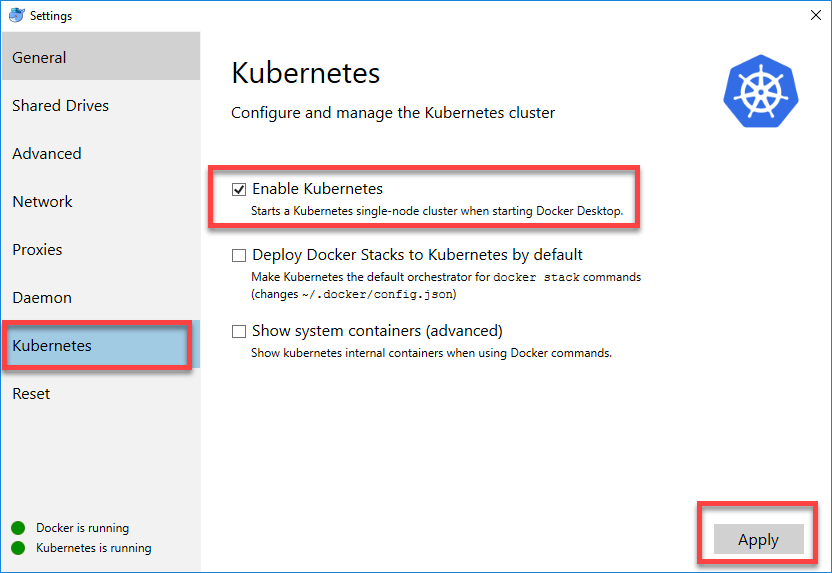
Select the Kubernetes menu item on the left and verify that the Enable Kubernetes is checked. If it isn’t, check it and click the Apply button at the bottom right:
Kubernetes tab

Reference: